Smart Contract Remix
Remix is an online IDE that you can use to rapidly develop and deploy smart contracts. If you're new to smart contracts, it's a great tool that lets you jump right in without needing to configure a local editor or struggle through environment configuration issues before getting started.
Remix contains a simulation of a blockchain that you can use to rapidly deploy and test your contracts. This simulation only exists within your browser, so you can't share it with others or use external tools or a front end to interact with it. However, you can also deploy to a variety of testnets from within Remix. Doing so will allow you to share your contract with others, at the cost of making it public.
In this article, we'll give you an overview of Remix, and show you how to deploy a contract to Chain Sepolia testnet.
For production / mainnet deployments the steps below in this guide will be almost identical, however, you'll want to ensure that you've selected Chain (mainnet) as the network rather than Chain Sepolia (testnet).
If you're already familiar with Remix, you probably want to jump down to here.
Objectives
By the end of this lesson, you should be able to:
- List the features, pros, and cons of using Remix as an IDE
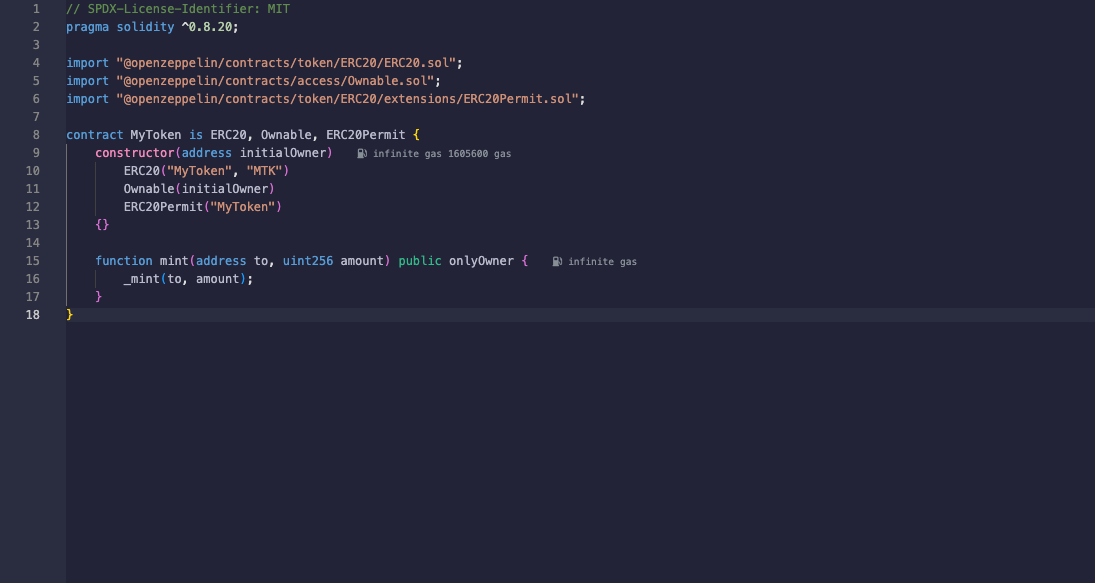
- Deploy and test the MyToken.sol demo contract in Remix
- Use Remix to deploy a contract to the Chain @ Sepolia testnet and interact with it in Etherscan
Remix Window Overview
Begin by opening a browser window and navigating to [remix.ethereum.org]. Click through the introductory tips, then review the editor. It is divided into three areas, which should look familiar.
Editor Pane
The editor pane loads with the Remix home screen, which contains news, helpful links, and warnings about common scams. You can close the home tab if you'd like, then open 1_MyToken.sol, located inside the contracts folder of the default_workspace.

You'll edit your code in the editor pane. It also has most of the features you're expecting, such as syntax and error highlighting. Note that in Remix, errors are not underlined. Instead, you'll see an❗to the left of the line number where the error is present.
At the top, you'll see a big green arrow similar to the Run button in other editors. In Solidity, this compiles your code, but it does not run it because you must first deploy your code to the simulated blockchain.
Terminal/Output
Below the editor pane, you'll find the terminal.

You'll primarily use this panel to observe transaction logs from your smart contracts. It's also one way to access Remix's powerful debugging tools.
Left Panel
As with many other editors, the left panel in Remix has a number of vertical tabs that allow you to switch between different tools and functions. You can explore the files in your current workspace, create and switch between workspaces, search your code, and access a number of plugins.
Plugins
Most of the features in Remix are plugins, and the ones you'll use the most are active by default. You can view and manage plugins by clicking the plug button in the lower-left corner, right above the settings gear. You can turn them off and on by clicking activate/deactivate, and some, such as the Debug plugin will be automatically activated through other parts of the editor.
Solidity Compiler
The first default plugin (after the search function) is the Solidity Compiler. Be sure to check the Auto compile option. Smart contracts are almost always in very small files, so this shouldn't ever cause a performance problem while editing code.
The Compile and Run script button in this plugin is a little misleading. This is not how you will usually run your contract through testing. You can click the I button for more information on this feature.
Finally, if you have errors in your contracts, the complete text for each error will appear at the bottom of the page. Try it out by introducing some typos to 1_Storage.sol.
Deploy & Run Transactions
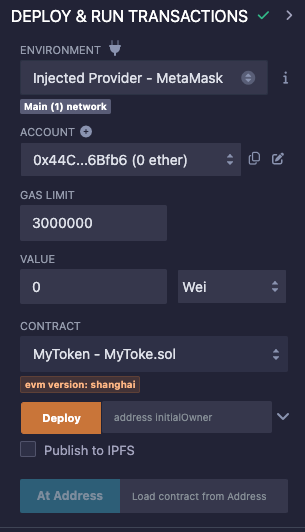
The Deploy & Run Transactions plugin is what you'll use to deploy your contracts and then interact with them. At the top are controls to select which virtual machine to use, mock user wallets with test Ether, and a drop down menu to select the contract you wish to deploy and test.
Fix any errors you introduced to 1_Storage.sol and click the orange Deploy button. You'll see your contract appear below as STORAGE AT <address>.
There are a couple gotchas that can be very confusing with deploying contracts in Remix.
First, every time you hit the Deploy button, a new copy of your contract is deployed, but the previous deployments remain. Unless you are comparing or debugging between different versions of a contract, or deploying multiple contracts at once, you should click the Trash button to erase old deployments before deploying again.
Second, if your code will not compile, clicking the deploy button will not generate an error! Instead, the last compiled version will be deployed. Visually check and confirm that there are no errors indicated by a number in a red circle on top of the Compiler plugin.
Prepare for Deployment
Testnets operate in a similar, but not exactly the same manner as the main networks they shadow. You need a wallet with the appropriate token to interact with them by deploying a new contract or calling functions in a deployed contract.
Set Up a Wallet
If you already have a wallet set up exclusively for development, you can skip to the next section. Otherwise, now is the time to jump in!
It is very dangerous to use a wallet with valuable assets for development. You could easily write code with a bug that transfers the wrong amount of the wrong token to the wrong address. Transactions cannot be reversed once sent!
Be safe and use separate wallets for separate purposes.
First, add the Coinbase or MetaMask wallet to your browser, and setup a new wallet. As a developer, you need to be doubly careful about the security of your wallet! Many apps grant special powers to the wallet address that is the owner of the contract, such as allowing the withdrawal of all the Ether that customers have paid to the contract, or changing critical settings.
Once you've completed wallet setup, enable developer settings and turn on testnets (Coinbase Settings, [MetaMask Settings]).
Add the Chain Sepolia Network to your Wallet
For this guide, you will be deploying a contract to the Chain Sepolia test network. You can fund your wallet with Chain Sepolia ETH using one of the faucets listed on the Chain Network Faucets page.
Get Testnet Ether
Testnet tokens have no real value, but the supply is not unlimited. You can use a faucet to get a small amount of Sepolia Ether to pay gas fees for testing. Most faucets allow you to ask for a small amount each day, and some won't send you more if your balance is too high.
You can find many faucets by searching, and it's good to keep a few bookmarked because they have a tendency to go down from time to time. Faucet providers are constantly combating bad actors and sometimes need to disable their faucets while doing so.
The Coinbase Wallet has faucets built in. Find them by clicking Settings -> Developer settings -> Testnet faucets.
You can also access the faucets on the web.
Once you have testnet Chain Sepolia Ether, you can view your balance under the Testnets tab in the Coinbase wallet, or by selecting the testnet from the network dropdown in MetaMask. Sadly, it's not actually worth the amount listed!
Deploying to Testnet
Once you have testnet Ether, you can deploy the MyToken contract!
Selecting the Environment
Open the Deploy & Run Transactions tab. Under Environment, select Injected Provider. It will list Coinbase, MetaMask, or any other wallet you have activated here.

The first time you do this, your wallet will ask you to confirm that you want to connect this app (Remix) to your wallet.
Once you are connected, you'll see the name of the network below the Environment dropdown.
For Chain Sepolia, you should see Custom (1432) network you should see Custom (1432) network.
If you don't see the correct network, change the active network in your wallet.
Deploy the Contract
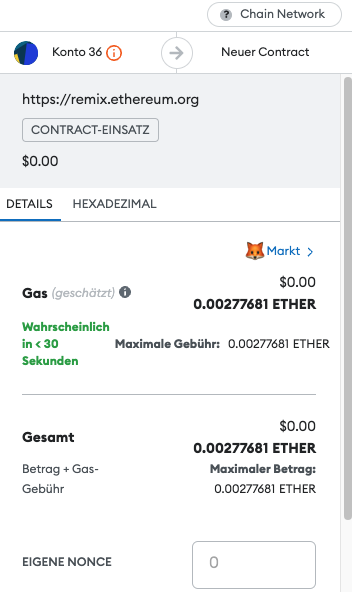
Click the orange Deploy button. Because it costs gas to deploy a contract, you'll be asked to review and confirm a transaction.

Always carefully review all transactions, confirming the transaction cost, assets transferred, and network. As a developer, you'll get used to approving transactions regularly. Do the best you can to avoid getting into the habit of clicking Confirm without reviewing the transaction carefully. If you feel pressured to Confirm before you run out of time, it is almost certainly a scam.
After you click the Confirm button, return to Remix and wait for the transaction to deploy. Copy its address and navigate to sepolia.blockscout.
Verify the Contract
You don't need to verify the contract if you've deployed one identical to a contract that has already been verified.
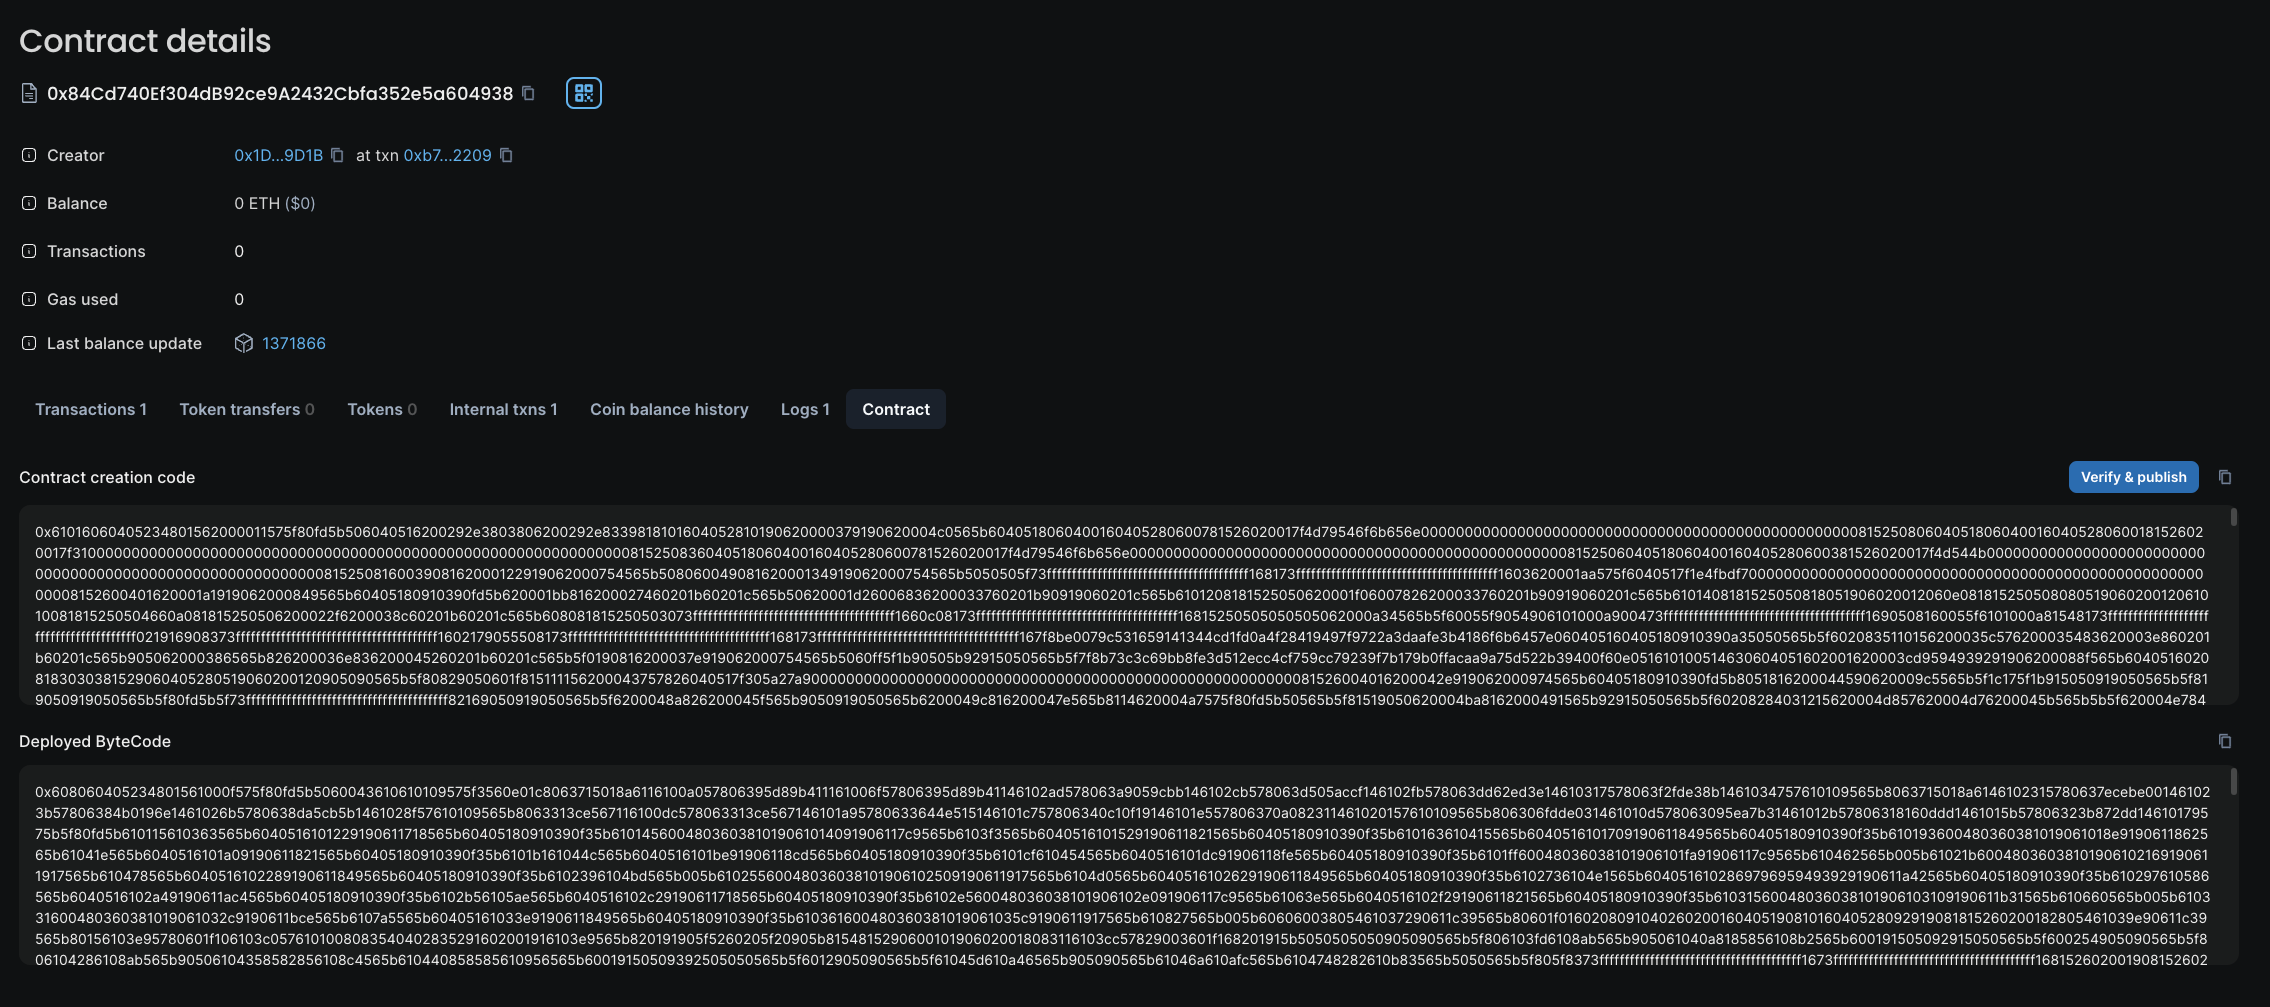
You can interact with your deployed contract using Remix, the same as before, but it's also possible to interact with it through Blockscout oder Etherscan. Paste your address in the search field to find it.
On this page, you can review the balance, information about, and all the transactions that have ever occurred with your contract.
Click the Contract tab in the main panel. If you've deployed a unique contract, at the top is a message asking you to Verify and Publish your contract source code.

Verifying your contract maps the names of your functions and variables to the compiled byte code, which makes it possible to interact with the contract using a human-readable interface.
Click the link. Your contract address is already entered.
Under Please select Compiler Type choose _Solidity (Single file)
For Please Select Compiler Version select the version matching the pragma at the top of your source file. Our examples are currently using _v0.8.20.
For Please select Open Source License Type pick the license that matches what you selected for your contract as the SPDX-License-Identifier. Pick None if you followed the Solidity-recommended practice of using UNLICENSED.
On the next page, copy and paste your source code in the window. Verify that you are not a robot, and click Verify and Publish. You should see a success message.
Click the linked address to your contract to return to the contract page. You'll now see your code!
Interact with the Contract
You can now interact with your contract using Blockscout. Click the Read Contract button. Both of your functions will be listed here and can be tested using the web interface.
Conclusion
You now have the power to put smart contracts on the blockchain! You've only deployed to a test network, but the process for real networks is exactly the same.